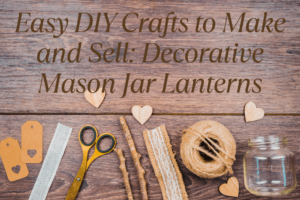
DIY Easy DIY Crafts to Make and Sell: Decorative Mason Jar Lanterns July 4, 2025 by Sara | Leave a Comment “One of the best ways to unwind on the weekend is to tap into your creativity. Whether it’s whipping up something delicious in the kitchen, crafting a simple DIY project for home décor, or creating handmade items to gift or sell—there’s something deeply satisfying about making something with your own hands.” Creating Decorative Mason Jar […] Read more » Crafts diy Easy DIY Crafts to Make and Sell: Decorative Mason Jar Lanterns handmade
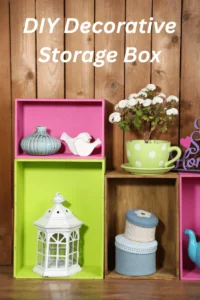
DIY DIY Decorative Storage Boxes June 19, 2025 / July 6, 2025 by Sara | Leave a Comment DIY Decorative Storage Boxes Read more » Decorative Storage Boxes diy
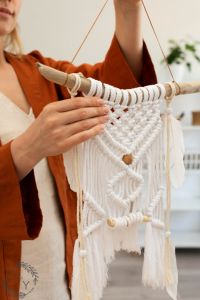
DIY KNITTING Handwoven Wall Hanging June 13, 2025 / June 17, 2025 by Sara | Leave a Comment A handwoven wall hanging is a decorative textile artwork created using traditional weaving techniques, often crafted on a loom. These pieces add warmth, texture, and a unique artistic touch to interior spaces, blending aesthetic appeal with cultural or personal expression. Made from materials like wool, cotton, jute, or even recycled fibers, handwoven wall hangings often […] Read more » handmade handwoven knitting wall hanging
DIY GIFT IDEA Personalized Bookmarks June 5, 2025 by Sara | Leave a Comment Personalized bookmarks are thoughtful, creative, and practical gifts that any book lover will appreciate. Whether handcrafted or custom-printed, they add a unique charm to reading time and beautifully reflect the reader’s personality and taste. From meaningful quotes to artistic designs, personalized bookmarks make every page turn a little more special. Here are some delightful ideas […] Read more » bookmark diy gift handmade
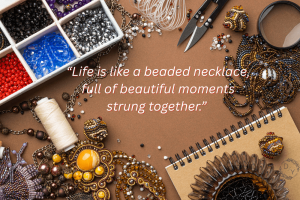
DIY GIFT IDEA Beaded Earrings May 19, 2025 by Sara | Leave a Comment Beaded earrings are a timeless,popular and versatile accessory that showcase intricate craftsmanship and personal touch to style.Created by stringing beads of various colors, shapes, and materials—such as glass, crystal, wood, or metal—these earrings can range from simple designs to elaborate patterns and cultural motifs. Often handmade, beaded earrings are popular in many indigenous and artisanal […] Read more » beaded diy earring gift handmade
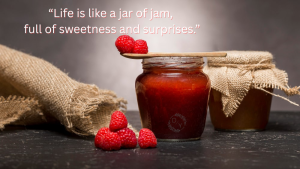
DIY GIFT IDEA Homemade Jam May 19, 2025 / May 19, 2025 by Sara | Leave a Comment Homemade jam one of the best way to preserve the flavors of fresh fruits and enjoy them year-round. Made with simple ingredients like fruit, sugar, and sometimes lemon juice or pectin, it offers a more natural way and a healthier version then the market one,which may contain preservatives or artificial flavors. The process of making […] Read more » diy gift homemade jam
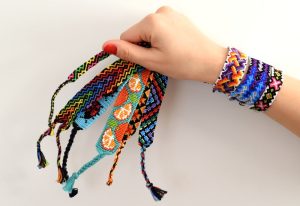
DIY GIFT IDEA Handmade Friendship Bracelets May 17, 2025 by Sara | Leave a Comment Handmade friendship bracelets are colorful, woven accessories crafted with care and creativity, often exchanged as symbols of friendship and affection. Traditionally made from embroidery floss or thread, these bracelets come in a variety of patterns and styles, each with its own unique design and meaning. The process of making them involves knotting techniques that can […] Read more » bracelet diy frendship day handmade gift
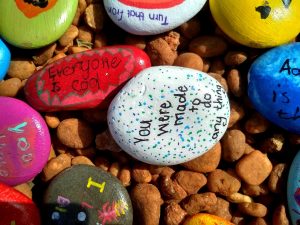
DIY GIFT IDEA Hand-Painted Rocks May 17, 2025 by Sara | Leave a Comment Hand-Painted Rocks are small stones creatively decorated with paint to showcase unique designs, patterns, or messages. This simple yet charming form of art allows individuals of all ages to express themselves through vibrant colors and imaginative illustrations. Whether used as home décor, garden accents, or hidden around communities as part of kindness rock projects, hand-painted […] Read more » diy gift painting stone
DIY GIFT IDEA Homemade Bath Bombs May 17, 2025 / May 17, 2025 by Sara | Leave a Comment Homemade bath bombs are a fun and creative way to add a luxurious touch to your bath routine. Made from simple ingredients like baking soda, citric acid, Epsom salt, and essential oils, these fizzy delights are easy to craft at home. You can personalize them with your favorite scents, natural colorants, and even dried flowers […] Read more » bath bath boms beauty diy gift homemade
DIY GIFT IDEA Customized Notebooks May 17, 2025 / May 17, 2025 by Sara | Leave a Comment Customized notebooks are personalized writing tools designed to reflect individual preferences, styles, or branding needs. Whether used for school, work, or personal journaling, these notebooks can be tailored in various ways, including cover design, paper type, binding, and size. Businesses often use customized notebooks for promotional purposes, adding logos and slogans to enhance brand visibility. […] Read more » craft diy gift notebook hand made customized