Loading...

Hand-Stitched Embroidery Hoop

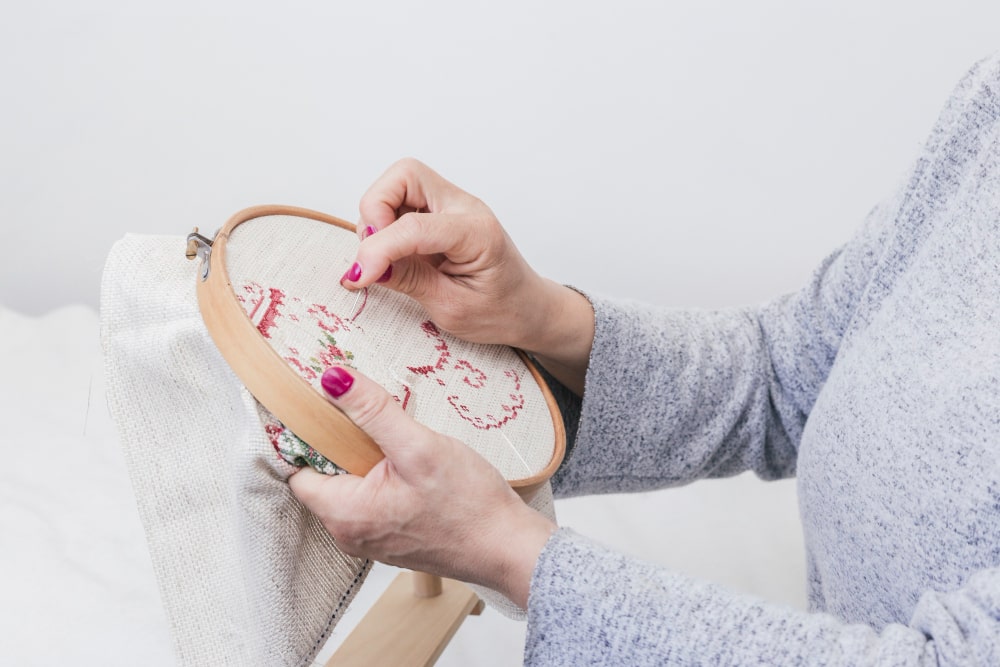
Add a touch of charm and craftsmanship to your space with this hand-stitched embroidery hoop art. Each piece is lovingly created using traditional embroidery techniques, showcasing intricate designs that reflect creativity and attention to detail. Framed in a wooden hoop, the artwork is ready to hang and makes a perfect gift or personal keepsake. Whether it features inspiring quotes, delicate florals, or whimsical illustrations, this unique wall decor adds warmth, personality, and a handcrafted touch to any room.w
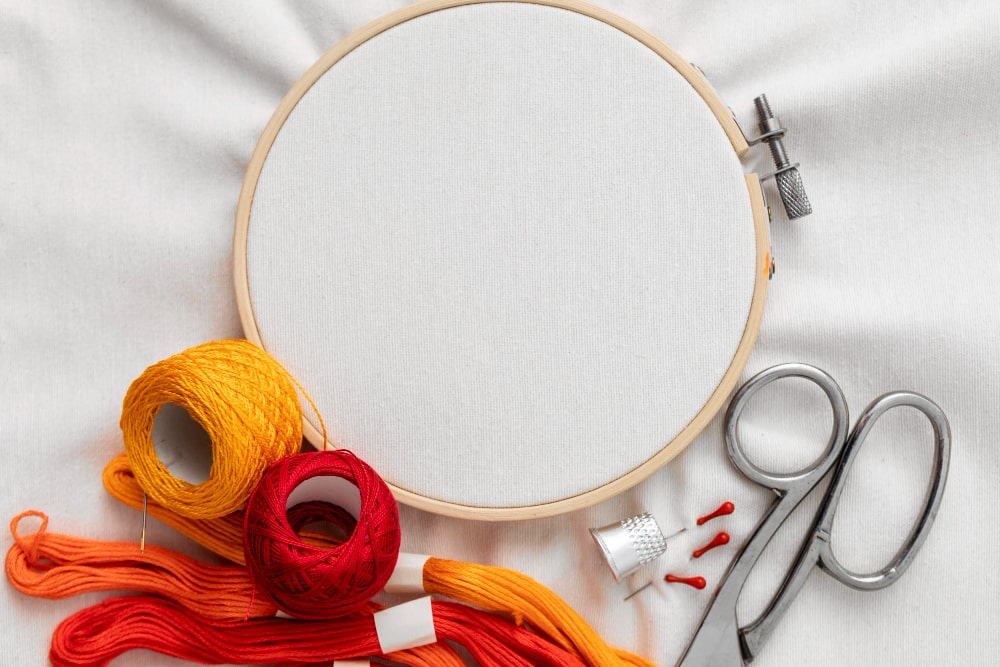
Materials Used:

  • Embroidery hoop
  • Fabric
  • Embroidery floss
  • Needle
  • Scissors

Steps:

  1. Place the fabric in the embroidery hoop and secure it tightly.
  2. Choose your design and transfer it to the fabric with a pencil or fabric chalk.
  3. Use different stitches (such as satin stitch, French knots, or backstitch) to fill in the design.
  4. Once finished, trim the fabric and frame it in the hoop.
  5. You can add a ribbon to hang it and present it as a lovely piece of art.

Decorative Coasters

Decorative coasters are both functional and stylish accessories that protect surfaces from water rings, heat, and scratches while adding a touch of personality to any space. Available in a variety of materials such as cork, ceramic, marble, or resin, these small yet impactful items often feature intricate patterns, witty quotes, or artistic designs that complement home décor. Whether used during entertaining or simply placed around the home, decorative coasters offer a practical way to express individual taste and elevate the aesthetics of coffee tables, dining settings, or office desks.

Materials Used:

  • Cork, wood, or ceramic tiles
  • Paint or decoupage supplies
  • Sealing spray

Steps:

  1. Start by cleaning your coasters or tiles to remove dust and dirt.
  2. Decorate them using paint, decoupage, or fabric (for a mosaic effect).
  3. Once the design is dry, seal the coasters with a protective spray to ensure longevity.
  4. Package the coasters in a set and tie them with a ribbon.

Personalized Tote Bag

A personalized tote bag makes a thoughtful and practical gift for any occasion. Whether customized with a name, meaningful quote, or unique design, it adds a personal touch that shows you put care into your choice. Perfect for everyday use—from grocery shopping to carrying books or work essentials—this stylish and durable bag combines function with sentiment. It’s an ideal gift for birthdays, holidays, teachers, bridesmaids, or just to show appreciation to someone special. With endless design options, a personalized tote is a gift they’ll cherish and use again and again.

Materials Used:

  • Plain fabric tote bag
  • Fabric paints or fabric markers
  • Stencils or freehand design

Steps:

1.Lay the tote bag flat and plan out your design.

2.Use fabric paints or fabric markers to add your design to the tote bag.

3.Allow the paint to dry completely, following the manufacturer’s instructions.

4.Iron the bag if necessary to set the paint.

5.Package it up for your friend to use on their next shopping trip.

Hand-Poured Candles

Our hand-poured candles are crafted with care, one batch at a time, to ensure exceptional quality and character. Made from natural soy wax and infused with premium fragrance oils, each candle delivers a clean, long-lasting burn and a warm, inviting scent. The hand-pouring process allows for greater attention to detail, resulting in a beautifully unique candle every time. Whether you’re setting the mood for relaxation, celebration, or quiet reflection, our hand-poured candles bring a touch of artisanal charm to any space.

Materials Used:

  • Wax (soy, paraffin, or beeswax)
  • Essential oils or fragrance oils
  • Wick
  • Container (e.g., mason jar, teacup)
  • Double boiler

Steps:

Melt the wax in a double boiler, stirring occasionally.

Once melted, add your desired fragrance oil or essential oil and mix well.

Place the wick in the container, securing it at the bottom with a small amount of wax.

Pour the melted wax into the container, holding the wick in place.

Let the candle harden for a few hours before trimming the wick and wrapping it up as a gift.

Homemade Sugar Scrub

A homemade sugar scrub is a simple, natural way to exfoliate and nourish your skin using ingredients you likely already have in your kitchen. Typically made with granulated sugar, which gently removes dead skin cells, and a moisturizing agent like coconut oil, olive oil, or honey, this DIY beauty treatment leaves your skin feeling soft, smooth, and refreshed. You can customize your scrub with essential oils for fragrance or add-ins like coffee grounds or lemon zest for extra benefits. Not only is it cost-effective, but making your own sugar scrub also ensures you’re avoiding harsh chemicals found in many commercial products. It’s perfect for a self-care routine or as a thoughtful, handmade gift.

Materials Used:

  • Sugar (brown or white)
  • Coconut oil
  • Essential oils (e.g., lavender or citrus)
  • Small jar or container

Steps:

  1. Mix together equal parts sugar and coconut oil until you get a thick, gritty consistency.
  2. Add a few drops of essential oil for fragrance.
  3. Store the mixture in a small jar or container.
  4. Decorate the jar with a ribbon and a tag that explains how to use the scrub.

Easy Knitted Scarf

An easy knitted scarf is a great project for beginners who are just learning how to knit. It usually involves using basic stitches like the knit stitch, which creates a soft, stretchy texture. You can make the scarf as long or as wide as you like, and choose any color of yarn to match your style. Since it doesn’t require complex patterns, it’s a relaxing and fun way to practice your knitting skills. In the end, you’ll have a warm and cozy scarf that you made yourself!

Materials Used:

  • Yarn (choose any color or texture)
  • Knitting needles

Steps:

  1. Cast on enough stitches to create the desired width of the scarf.
  2. Knit every row to create a simple, classic knit pattern (garter stitch).
  3. Continue knitting until the scarf reaches the desired length.
  4. Bind off and weave in any loose ends.
  5. Wrap it up in a nice presentation and gift it with a thoughtful note.

Easily Homemade Lip Balm

Making your own lip balm at home is simple, fun, and budget-friendly. All you need are a few natural ingredients like beeswax, coconut oil, and shea butter. Melt them together, add a few drops of your favorite essential oil for scent or flavor, and pour the mixture into small containers to cool and set. In just a few minutes, you’ll have a smooth, nourishing lip balm that’s free of chemicals and customizable to your liking.

Materials Used:

  • Beeswax
  • Coconut oil
  • Essential oils (e.g., lavender or peppermint)
  • Small containers or lip balm tubes

Steps:

  1. Melt the beeswax and coconut oil in a double boiler until fully combined.
  2. Add a few drops of your chosen essential oil to the mixture and stir.
  3. Pour the mixture into small containers or lip balm tubes while it’s still liquid.
  4. Let it cool and solidify before gifting.

Hand-Painted Mugs Gift

Hand-painted mugs make a thoughtful and personalized gift for any occasion. Each mug is uniquely crafted with care, often featuring custom designs, names, or meaningful messages that reflect the recipient’s personality or interests. Whether adorned with floral patterns, inspirational quotes, or whimsical art, these mugs add a special touch to daily routines. Ideal for birthdays, holidays, or just to show appreciation, hand-painted mugs combine practicality with heartfelt sentiment, turning an everyday item into a cherished keepsake.

Materials Used:

  • Plain ceramic mug
  • Ceramic paints or sharpie markers
  • Paintbrushes
  • Stencils (optional)

Steps:

  1. Wash the ceramic mug thoroughly to remove any dust or oil.
  2. Using ceramic paints or sharpie markers, design the mug with patterns, quotes, or a personal message.
  3. Let the mug dry completely. If you use paint, bake it according to the instructions on the paint container to ensure it sets.
  4. Package the mug with a set of tea bags or a coffee sachet for an added touch.

Personalized Photo Frame

A personalized photo frame is a unique and meaningful way to preserve and showcase cherished memories. Unlike standard frames, personalized photo frames can be customized with names, dates, messages, or designs that reflect the special moments captured in the photograph. Whether it’s for a birthday, anniversary, graduation, or any other significant event, a custom frame adds a personal touch that transforms a simple photo into a heartfelt keepsake. These frames can be made from various materials such as wood, metal, or acrylic, and may include decorative elements like engravings, motifs, or even embedded lights. A personalized photo frame not only enhances the beauty of a picture but also tells a story, making it a perfect gift or a treasured piece of home décor.

Materials Used:

  • Wooden frame
  • Paint (any color)
  • Glue
  • Decorative embellishments (e.g., beads, buttons, or glitter)
  • A favorite photo

Steps:

  1. Start by painting the wooden frame in your desired color. Let it dry completely.
  2. Once dry, use glue to attach embellishments like beads, buttons, or glitter around the edges of the frame.
  3. Carefully place a photo of the recipient or a shared memory inside the frame.
  4. Add a personal message or quote on the back or on the front with a marker or pen.
  5. Package the frame nicely, and it’s ready for gifting.

How to Make Lip Balm at Home With Natural Ingredients

How to make lip balm at home with natural ingredients, including beeswax, shea butter and essential oils

Lip balm is one of my favorite DIYs because it always turns out so wonderful! Yes, you can purchase natural and organic lip balm for inexpensive, but you can make it for even cheaper.

Plus, homemade lip balm can be customized however you like, so you can make the perfect tube (or tin) of amazing lip balm for you!

I love DIY lip balm as an inexpensive gift idea as well – think stocking stuffers, small teacher gifts or gifts for kids. Everyone loves lip balm, AM I RIGHT?

 I use a combination of beeswax, shea butter, cocoa butter, almond and jojoba oils. These are some seriously rich and nourishing oils, ya’ll!

I love this combination in DIY lip balm because it makes a luxurious feeling balm that is not too heavy on the beeswax

SUPPLIES:

Lip balm labels (optional, but so cute!)

Lip balm tubes or lip balm tins

Double boiler (or makeshift one like I do)

Mini whisk or spoon

Kitchen scale (optional, see note below on measuring)

INGREDIENTS:

  • Beeswax
  • Shea butter
  • Cocoa butter
  • Almond oil
  • Jojoba oil
  • Vitamin E
  • Essential oil of choice